

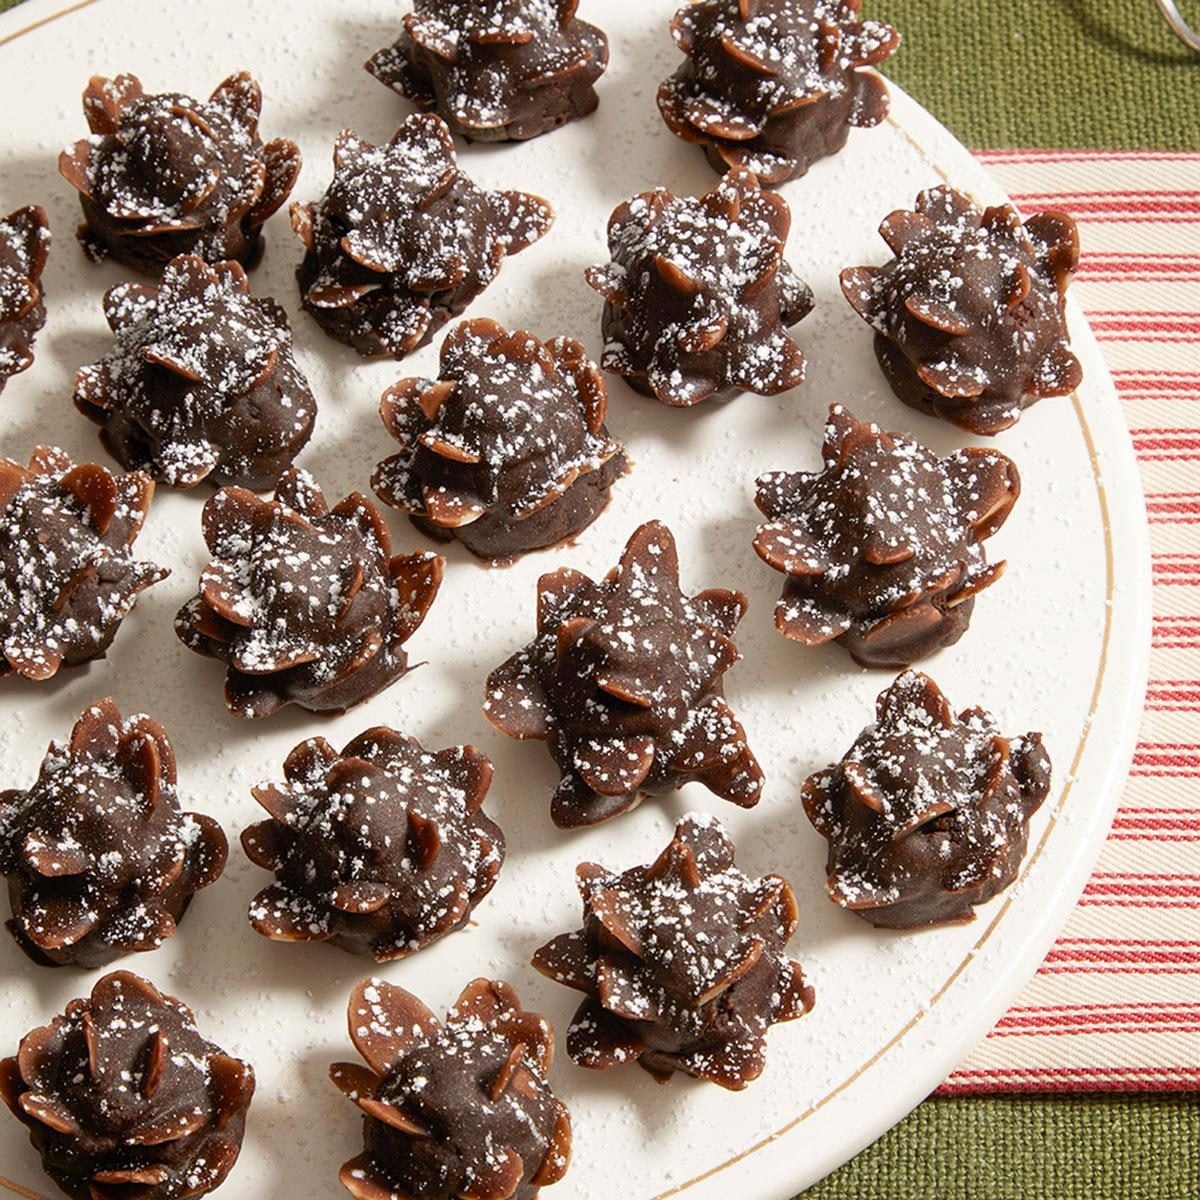

Bring these playful pine cone brownies as your festive contribution to a holiday party.
These pine cone brownies add woodland whimsy to the Christmas dessert table. Each chocolatey pine cone looks like it was just plucked out of a frosty winter forest and placed right on a Christmas platter. Sliced almonds create the pine cones’ prickly shells, then everything is coated in melted frosting for a seamless look. A little confectioners’ sugar adds a festive just-snowed effect.
This recipe takes a cake-pop approach, mixing store-bought chocolate frosting with crumbled brownies (made from a mix!) to shape into a cone. We like to use brownies instead of cake because they help the almonds stay inside. Plus, they’re a lot more chocolaty—who can argue with that?
Ingredients for Pine Cone Brownies
- Brownie mix: Buy the best brownie mix for this recipe, as well as all the ingredients called for on the box. Fudgy ones with rich cocoa flavor are best for these pine cone brownies.
- Chocolate frosting: We opted for store-bought chocolate frosting for ease, but feel free to use homemade chocolate frosting if you prefer.
- Sliced almonds: Sliced almonds, not slivered almonds, have the best shape to make the pine cone shell. If you’re having trouble sticking the almonds into the brownie cones, make little indents in the cones using a butter knife.
- Confectioners’ sugar: Optionally, dust confectioners’ sugar onto the pine cone brownies to give each one a snowy look. It adds dimension to the pine cones—we highly recommend it.
Directions
Step 1: Bake the brownies

Prepare and bake the brownie mix according to the package directions. Let the brownies stand in the pan for five minutes.
Step 2: Mix them with frosting
Transfer the warm brownies to the bowl of a stand mixer with half of the chocolate frosting. Beat everything together until the mixture is smooth.
Step 3: Form the pine cones and add almonds

Scoop the brownie mix by the tablespoonful and use your hands to shape the dough into a teardrop pine cone. Arrange the sliced almonds in each brownie to make it look like a pine cone, pressing them into the dough with the pointy ends facing out. (This is a bit of a tedious process, so call in the help of other hands—especially tiny ones!)
Editor’s Tip: Your hands will get dirty as you shape, which may cause the brownie mixture to stick even more. Take a moment to wash and dry your hands thoroughly every so often, so it’s easier to shape. If you’re having trouble sticking the almonds in, make an indentation with a butter knife.
Step 4: Coat them in melted chocolate

Transfer the remaining chocolate frosting to a small microwaveable bowl. Microwave it on high in 15-second increments, stirring between each (to prevent burning!), until it’s fully melted.
Place the brownies on a wire rack over a baking tray. Pipe or spoon the melted frosting over each pine cone to cover the almonds and brownie completely. Let the melted frosting cool until the chocolate hardens.
Step 5: Dust them with confectioners’ sugar
Dust the pine cones lightly with confectioners’ sugar, if desired.

Recipe Variations
- Use homemade brownies: Brownie purists can totally use their favorite brownie recipe here instead of a prepared box mix. If you add mix-ins, make sure they’re small, so they don’t disfigure the pine cone shape.
- Make them mocha: Espresso powder is the secret ingredient to better chocolate bakes. Add a little bit to your brownie mix to bring out the chocolate flavor even more.
- Add flavorings: Lean into the Christmas flavors by adding peppermint extract, cinnamon or orange zest to the brownie batter. Even mini chocolate chips are a great addition.
How to Store Pine Cone Brownies
Store pine cone brownies in an airtight container in the fridge for up to five days. If you can, store them without the confectioners’ sugar on top, as the sugar will melt in the fridge.
Can you make pine cone brownies ahead of time?
Yes, you can make pine cone brownies ahead of time. Shape the brownies into pine cones, then add the almonds as instructed. Place the pine cones in an airtight container in the fridge for up to three days. When you’re ready to serve them, cover the pine cones with melted chocolate and finish them with confectioners’ sugar.
Pine Cone Brownies Tips

Can I use cereal instead of almonds for pine cone brownies?
Absolutely! If you have a nut allergy, skip the almonds and use chocolate flake cereal instead. Put them really close together to make them more realistic. People swear by Chocapic cereal for the most realistic-looking pine cone shells. If the cereal is breaking when you press it into the brownies, create indentations first with a butter knife, then add the cereal.
Can I make pine cone brownies gluten free?
We haven’t yet tested this pine cone brownies recipe with gluten-free brownies. However, I feel confident that any gluten-free brownie mix would work here. Make sure all other packaged goods are certified gluten free, and do not use a baking spray to grease your brownie pan. They often contain flour!
